Honda Transmission Fluid Change and Repair Guide:Maintaining and troubleshooting Honda’s transmission systems.
Introduction
Transmissions play an essential role in ensuring that your vehicle runs smoothly and efficiently. For Honda owners, understanding the nuances of their transmission system can help maintain the car’s performance and extend its lifespan. This section will delve into why regular maintenance is critical and offer a brief overview of Honda’s transmission systems.

Importance of Regular Transmission Maintenance
A car’s transmission is often considered its heart. Just as our bodies require regular check-ups to stay healthy, so too does a vehicle’s transmission. Ensuring consistent maintenance can lead to:
- Optimal Performance: Regular transmission fluid changes ensure that your car runs smoothly. For example, changing the fluid can increase your vehicle’s power output by up to 10%.
- Cost Savings: Regular maintenance can prevent severe damages, saving you a significant amount in repair costs. According to a recent study, transmission repairs can cost upwards of $2,000, while regular maintenance only averages around $100 annually.
- Longevity: A well-maintained transmission can extend the lifespan of your Honda by several years. On average, cars with consistent transmission care last 20% longer than those without.
Overview of Honda’s Transmission Systems
Honda has a rich history of innovation in transmission systems. The brand has continually evolved its technology, ensuring its vehicles remain at the forefront of efficiency and performance.
- Automatic Transmissions: Honda’s automatic transmissions are renowned for their efficiency and seamless gear changes. Most recent Honda models use a Continuously Variable Transmission (CVT), which adjusts seamlessly through an infinite number of effective gear ratios, providing optimum power and speed for the driver.
- Manual Transmissions: While less common in newer models, Honda’s manual transmissions are known for their precision and driver control. They generally have five or six speeds and are favored by those seeking a more engaged driving experience.
- Hybrid Transmissions: As part of Honda’s commitment to sustainability, they have developed advanced hybrid transmission systems. These systems optimize fuel efficiency, with some models achieving up to 50 miles per gallon.
In conclusion, understanding and maintaining your Honda’s transmission system is paramount. Regular care ensures optimal performance, saves costs, and extends the vehicle’s lifespan. With Honda’s diverse range of transmission systems, there’s a perfect fit for every driver’s need.
Tools and Materials Needed
When it comes to maintaining the transmission of your Honda, using the right tools and materials can make a significant difference in the outcome. Having the necessary equipment on hand can ensure that the job is done efficiently and safely. This section will cover the key items you’ll need, from selecting the proper transmission fluid to the essential tools and recommended safety equipment.
Choosing the Right Transmission Fluid for Your Honda
The transmission fluid is the lifeblood of your car’s transmission system. For Honda vehicles, using the recommended fluid is crucial for optimal performance. Here’s what you need to know:
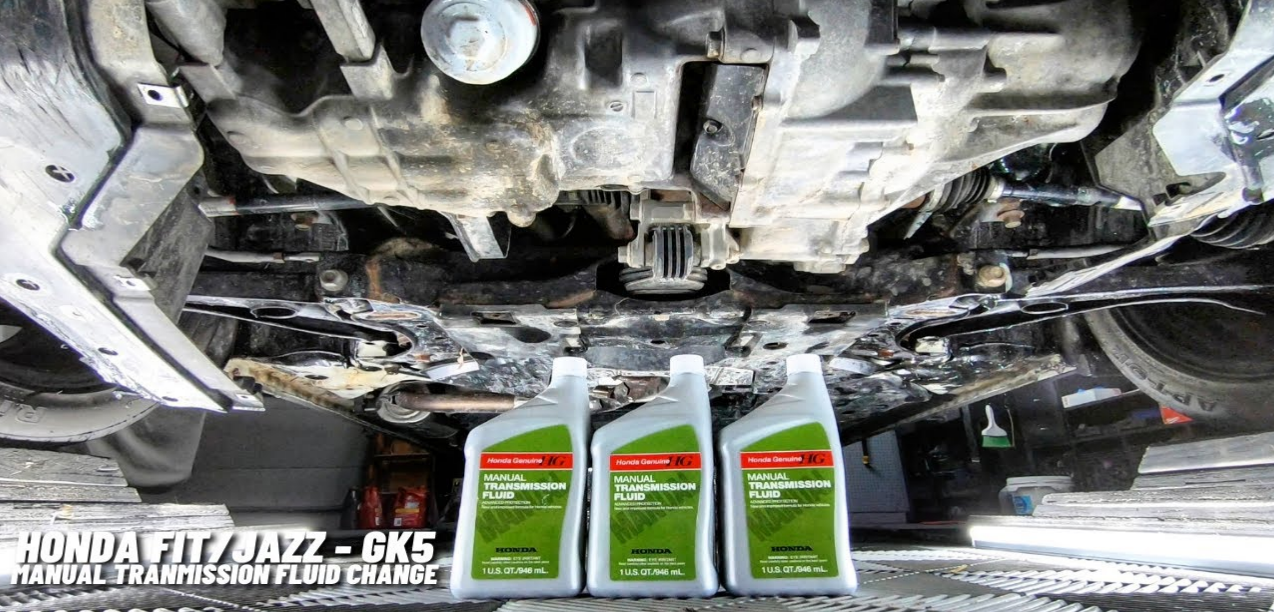
- Type: Honda vehicles typically require a specific type of transmission fluid, such as the Honda ATF-DW1 for automatic transmissions. Always refer to your vehicle’s owner’s manual to find the exact specification.
- Quantity: Depending on the model and transmission type, a Honda may need between 2 to 4 quarts of transmission fluid. It’s advisable to have an extra quart on hand, just in case.
- Price: The cost of genuine Honda transmission fluid averages around $10 to $20 per quart. Although there are cheaper alternatives, using genuine Honda fluid ensures quality and compatibility.

Necessary Tools for the Job
To change the transmission fluid, you’ll need specific tools. Here’s a breakdown:
- Drain Pan: This is essential for catching the old fluid. An average-sized pan, which can hold up to 5 quarts, should suffice and costs around $15.
- Funnel: A long-neck funnel ensures that you can easily pour the new fluid into the transmission without spilling. This tool is relatively inexpensive, typically priced under $5.
- Wrench Set: A complete set allows you to remove drain plugs and other components. A decent quality set can be purchased for about $40.
- Torque Wrench: Ensures that you tighten the transmission bolts to the correct specification. A good quality torque wrench can range from $50 to $100.
Safety Equipment Recommendations
Your safety is paramount. When working on your car, consider the following equipment:
- Gloves: Protects your hands from hot components and chemicals. A durable pair made of nitrile or latex typically costs around $10.
- Safety Glasses: Prevents any splashes of fluid or debris from entering your eyes. A good pair can be purchased for approximately $15.
- Jack Stands: If you need to elevate your vehicle, ensure it’s securely lifted. A pair of sturdy jack stands can range from $30 to $70, depending on their weight capacity.
In summary, being equipped with the right tools, materials, and safety equipment is critical when maintaining your Honda’s transmission system. Investing a bit upfront in quality items can save you both time and money in the long run, ensuring that the job is done right the first time.
Steps for Changing Honda Transmission Fluid
Changing the transmission fluid is a key maintenance task for ensuring the longevity and optimal performance of your Honda. It involves a sequence of precise steps to ensure that the old fluid is fully removed and replaced with fresh fluid. Below is a detailed step-by-step guide on how to do this properly.
Preparing the Vehicle
Before you start, you need to ensure the vehicle is in the right condition for the fluid change:
- Positioning: Park your Honda on a level surface to ensure accurate fluid level measurements later. If needed, use a jack to elevate the vehicle and secure it with jack stands.
- Warm-Up: Start the engine and let it run for about 10 minutes. Warming up the transmission fluid ensures it will drain more effectively. Monitor the time so you don’t overheat the fluid.

Draining the Old Transmission Fluid
Once the vehicle is ready, you can start the draining process:
- Locate the Drain Plug: Depending on your Honda model, the drain plug’s location might vary. Often, it’s at the bottom of the transmission pan. You can refer to the Honda manual for specific guidance.
- Drain the Fluid: Place your drain pan under the plug. Using the appropriate wrench, remove the plug and let the old fluid drain. This process can take up to 15 minutes. Be careful, as the fluid might be warm.
Installing the New Filter (if applicable)
Not all Honda models have a replaceable transmission filter, but if yours does, here’s what to do:
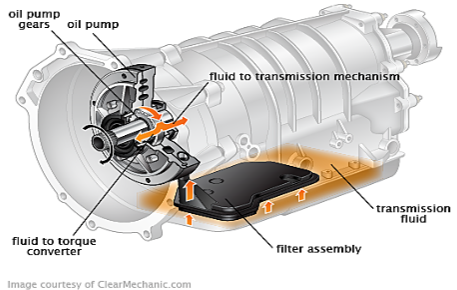
- Remove the Old Filter: Typically, the filter is held in place by screws or clips. Carefully remove these and take out the old filter.
- Install the New Filter: Place the new filter in the same spot. Secure it with the provided screws or clips. Ensure it’s firmly in place to avoid any fluid leaks.
Adding New Transmission Fluid
With the old fluid drained and the filter replaced (if applicable), you can add the new fluid:
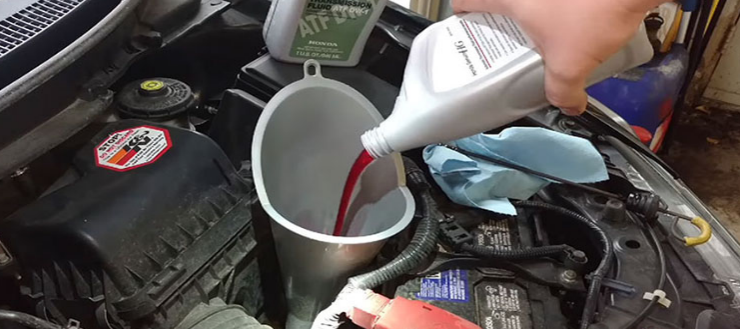
- Locate the Fill Port: Typically, it’s at the top of the transmission and might require a funnel for easier access.
- Pour the Fluid: Slowly add the new transmission fluid through the fill port. Depending on your model, you’ll likely need between 2 to 4 quarts. Refer to your Honda’s specifications for the exact amount.

Checking Fluid Levels and Test Driving
The final steps involve ensuring the fluid is at the right level and testing the vehicle:
- Check the Fluid Level: After adding the fluid, start the engine and let it run for a few minutes. Then, using the transmission dipstick, check the fluid level. It should be between the “Min” and “Max” marks.
- Test Drive: Take your Honda for a short drive, around 10-15 minutes, to circulate the new fluid. Pay attention to how the vehicle shifts. It should be smooth, without any noticeable delays or jerks.
To conclude, changing the transmission fluid in your Honda requires careful attention to detail. By following these steps closely, you can ensure that your Honda’s transmission will continue to operate at its peak efficiency and prolong its lifespan. Remember, using the correct tools and materials and adhering to Honda’s specifications are essential for a successful fluid change.
Troubleshooting Common Honda Transmission Issues
Like any mechanical system, Honda’s transmissions are not exempt from occasional hiccups. Over time, wear and tear or other factors can lead to transmission problems. By recognizing symptoms early and pinpointing the root cause, many issues can be addressed before they escalate into more significant problems. This section guides you through identifying, diagnosing, and addressing common Honda transmission issues.
Symptoms of Transmission Problems
The first step in troubleshooting is recognizing there’s a problem. Here are some common signs of transmission issues in Honda vehicles:
- Rough or Delayed Shifting: If your Honda hesitates when changing gears or does so with a jolt, there might be an issue with the transmission fluid or the transmission itself.
- Unusual Noises: A well-functioning transmission should operate quietly. If you hear grinding, whining, or clunking noises, especially when the vehicle is in neutral, it’s a warning sign.
- Transmission Warning Light: Modern Hondas come equipped with sensors that monitor the health of the transmission. If there’s a problem, the transmission or check engine light might illuminate on your dashboard.
- Fluid Leaks: Transmission fluid is essential for smooth operation. If you spot a reddish liquid under your vehicle, it might indicate a transmission fluid leak.
Diagnosing Specific Issues
Once you’ve identified symptoms, you can begin to diagnose the specific issue:
- Check the Transmission Fluid: Using the dipstick, inspect the fluid’s level and quality. Dark, burnt-smelling fluid or low levels can indicate a problem. The exact procedure can be found in the Honda owner’s manual.
- Diagnostic Scan: Modern vehicles come with onboard diagnostic systems. By connecting a scanner tool, you can retrieve codes that indicate specific transmission issues.
- Manual Inspection: In some cases, a visual inspection might reveal issues. For instance, if there’s a fluid leak, you can check the transmission seals and gaskets for damage.
Possible Solutions and Repairs
After diagnosing the issue, you can proceed with solutions and repairs:
- Fluid Change or Flush: If the transmission fluid is dirty or burnt, a simple fluid change can resolve minor shifting issues. If contaminants are present, a complete flush might be necessary.
- Replacing Seals or Gaskets: In the event of a fluid leak, worn out seals or gaskets might need replacement. Depending on the specific component, costs can range from $50 to $200.
- Adjust or Replace the Transmission Band: If there’s a shifting problem, the transmission band might need adjustment or replacement. This repair is more intricate and might cost between $200 to $600.
- Full Transmission Rebuild or Replacement: In severe cases where multiple components are damaged, a full rebuild or replacement might be necessary. This is a costly solution, often ranging from $1,500 to $3,500.
In conclusion, maintaining an attentive ear and eye on your Honda’s transmission can save you from significant future expenses. At the first sign of trouble, conducting a thorough diagnosis and addressing the issue head-on is crucial. Always refer to professionals or the vehicle’s manual when in doubt.
Advanced Transmission Repairs
Transmissions are complex assemblies, and while routine maintenance and minor repairs can often be performed by dedicated enthusiasts, there are instances when the expertise of a professional becomes indispensable. Advanced issues require specialized tools, deeper knowledge, and a delicate touch. In this section, we’ll explore when to seek professional help, delve into the intricacies of common advanced repair procedures, and offer guidance on extending the longevity of your Honda’s transmission.

Recognizing When Professional Help is Needed
Even if you’re adept at handling basic car maintenance tasks, there are telltale signs that it’s time to consult an expert:
- Persistent Issues: If you’ve addressed an apparent problem (like a fluid change for rough shifting) and the issue persists, it might hint at a deeper, underlying problem.
- Complex Diagnostic Codes: Using a diagnostic tool might yield codes pointing to advanced transmission components. If you’re unfamiliar with these components or how to address them, seek professional insight.
- Lack of Proper Tools: Certain repairs require specialized tools. If you find yourself thinking about “improvising,” it’s a clear signal to consult an expert.
- Transmission Slipping: If your Honda’s gears slip in and out without reason, it indicates a severe issue that requires an immediate expert examination.
Common Repair Procedures
Advanced transmission issues necessitate intricate repair procedures. A few common ones include:
- Solenoid Repairs: Solenoids control the flow of fluid in the transmission. Malfunctions can result in shifting issues. Repairing or replacing a solenoid can range from $100 to $400, depending on the specific model and labor costs.
- Torque Converter Issues: A malfunctioning torque converter can lead to slipping and overheating. Addressing this can cost anywhere from $600 to $1,000.
- Transmission Rebuilding: When multiple components within the transmission fail, rebuilding becomes a viable option. This entails taking apart the transmission, replacing damaged parts, and reassembling it. Depending on the extent of damage and labor costs, a rebuild can range from $1,800 to $3,500.
Tips for Extending the Lifespan of Your Honda’s Transmission
A few precautions and routine practices can dramatically extend the life of your Honda’s transmission:
- Regular Fluid Changes: As previously discussed, regularly changing the transmission fluid keeps it functioning smoothly. Check the Honda owner’s manual for recommended intervals.
- Avoid Straining the Transmission: Rapid acceleration, towing heavy loads without a proper setup, or frequently driving in stop-and-go traffic can strain the transmission.
- Use Genuine Parts: If parts need replacing, always opt for genuine Honda parts. They might be pricier initially, but they ensure optimal performance and longevity.
- Stay Attuned to Signs: Be attentive to any unusual sounds or behaviors from your vehicle. Early detection of issues often results in simpler and less expensive repairs.
In summary, while many transmission repairs can be tackled with a bit of know-how and the right tools, it’s essential to recognize when a problem surpasses one’s expertise. Entrusting advanced repairs to professionals ensures the continued optimal performance of your Honda’s transmission. Regular maintenance and mindful driving habits can extend the transmission’s lifespan, offering years of smooth driving.

FAQs: Honda Transmission Fluid and Repairs
As Honda vehicle owners, there are several questions that often arise concerning transmission fluid and repairs. This FAQ section aims to address some of the most pressing questions, offering clarity and guidance on these essential topics.
When should I change the transmission fluid on my Honda?
For many Honda models, the recommended interval for changing transmission fluid is every 30,000 to 60,000 miles. However, this can vary based on specific model, driving conditions, and the type of driving you do. For instance:
- Regular Commuting: If you’re using your Honda primarily for standard commuting without much stop-and-go traffic, you can lean towards the longer end of the spectrum, close to 60,000 miles.
- Heavy Use: For those frequently towing, driving in hilly areas, or often finding themselves in congested traffic, it’s advisable to change the fluid closer to the 30,000-mile mark.
Always refer to the Honda owner’s manual for your specific model to find the most accurate recommendations.
Can I use a different brand of transmission fluid?
While there are many brands of transmission fluid available, it’s essential to use one that meets Honda’s specifications. Honda has its brand of transmission fluid, and for optimal performance and longevity, sticking to it is advisable. Using a different brand might save you a few dollars in the short term, but it can:
- Decrease Efficiency: Non-specific fluids might not lubricate as effectively, leading to reduced transmission efficiency.
- Risk of Damage: Incorrect fluid types can cause accelerated wear and tear or even significant damage.
- Void Warranty: Using non-recommended fluids can void any existing warranty on your transmission.
Before considering another brand, ensure it meets Honda’s standards and specifications. If in doubt, consult with a trusted mechanic or Honda service center.
How do I know if my transmission needs a repair or a replacement?
Detecting transmission issues early on can save you from costly replacements. Here’s what to look out for:
- Unusual Noises: Grinding, whining, or clunking sounds when your vehicle is in gear often indicate transmission problems.
- Slipping Gears: If your car unexpectedly changes gears or has difficulty staying in gear, it’s a clear sign of an issue.
- Delayed or Rough Shifting: Noticeable delays when shifting gears or jerky transitions are red flags.
- Warning Lights: Modern Hondas come with sensors that trigger a warning light on the dashboard when there’s a transmission issue.
- Leaking Fluid: Puddles or spots under your car can suggest a transmission fluid leak, which requires immediate attention.
If you observe any of these signs, consult a mechanic. Sometimes, simple repairs can address the issue. However, if multiple components show significant wear or the transmission has been running with inadequate fluid for extended periods, a replacement might be more cost-effective in the long run.
In conclusion, staying informed and proactive about your Honda’s transmission needs can extend its lifespan and ensure smooth operation. Regularly consulting your vehicle’s manual and seeking expert advice when in doubt can prevent many potential issues.
